什么时候我们需要用到图像识别?
在我们做App自动化测试的时候,会发现很多场景下元素没有id、content-desc、text等等属性,并且有可能也会碰到由于开发采用的是自定义View,View中的元素也无法识别到,很多的自动化测试框架对此类场景束手无策。Appium在V1.9.0中有给我们带来了针对于图像识别的全新图片元素定位的方法:-image
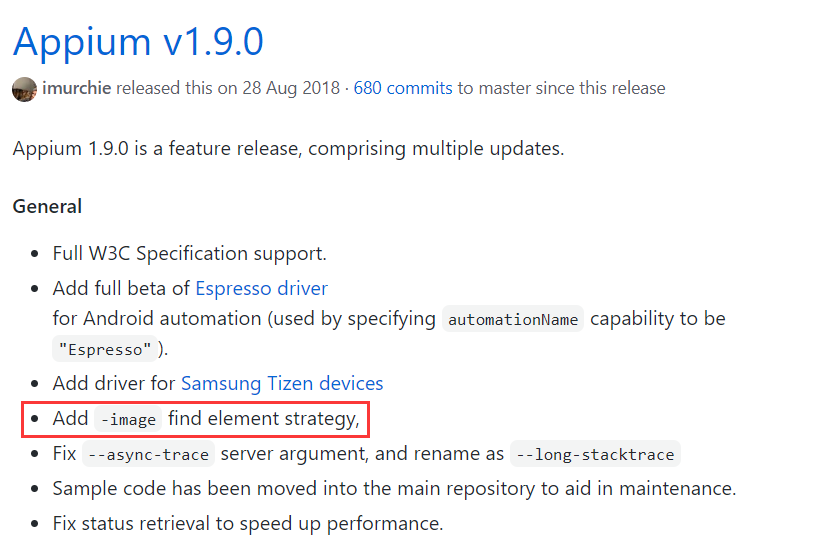
安装
在Appium中用到的图像识别库是OpenCV,因为在Appium V1.9.0中-image查找元素方式才被引入进来,所以需要保证你有安装V1.9.0或以上版本的Appium。
这里需要注意,Appium图像识别的使用只能适用于通过npm安装Appium的方式,通过Appium-desktop安装Appium的方式是不适用的。
Step1:通过npm安装Appium
安装配置Node.js
- 下载对应系统和位数的node.js安装包https://nodejs.org/en/download/
- 选择安装路径,我这里选择安装到D盘
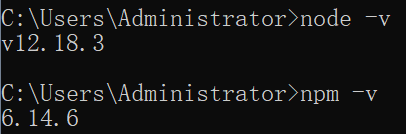
- 进入cmd,输入node -v以及npm -v检测(npm是node.js自带的包管理器)
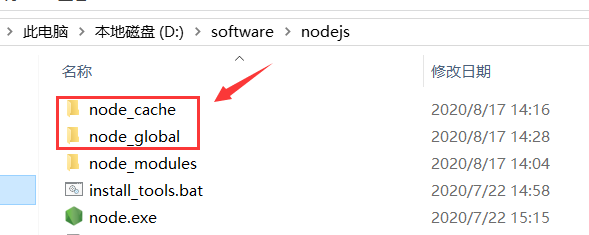
- 指定npm安装的全局模块和缓存的路径,如果不指定默认会安装到C盘中【C:\Users\用户名AppData\Roaming\npm】
- 在nodejs目录下新建【node_cache】和【node_global】目录

- 输入如下命令指定:
npm config set prefix "D:\software\nodejs\node_global"
npm config set cache "D:\software\nodejs\node_cache"
- 在nodejs目录下新建【node_cache】和【node_global】目录
- 配置node.js环境变量
- 在系统变量中新建【NODE_PATH】变量名,变量值为【D:\software\nodejs\node_global\node_modules】
- 在系统变量【Path】中追加【%NODE_PATH%】
- 将用户变量【Path】中原来的【C:\Users\用户名\AppData\Roaming\npm】修改为【D:\software\nodejs\node_global】
安装Appium
-
设置npm淘宝镜像地址
npm config set registry https://registry.npm.taobao.org -
npm通过全局的方式安装Appium(默认下载安装最新版本Appium)
npm install -g appium
Step2:安装opencv4nodejs所需要的依赖
安装Cmake
- 进入到https://cmake.org/download/下载对应软件包,解压到任意目录
- 找到系统变量Path,追加【D:\software\cmake-3.18.1-win64-x64\bin】,其中cmake-3.18.1-win64-x64是为Cmake解压之后的目录名
安装building tools
npm install --global windows-build-tools
Step3:Appium中安装图像识别模块opencv4nodejs
由于网络和各种环境问题的影响,通过官方推荐的【npm i -g opencv4nodejs】命令直接安装opencv4nodejs模块的话,会发现存在很多的问题。
按照https://www.npmjs.com/package/opencv4nodejs#how-to-install里面的说明,这里使用的是手动安装OpenCV的方式
-
在系统环境变量中,添加【OPENCV4NODEJS_DISABLE_AUTOBUILD】变量名,变量值为【1】
-
安装choco(windows上面的软件管理方案,可以解决部署软件复杂、容易出错问题),官网安装说明地址:https://chocolatey.org/install,打不开的同学给大家搬运过来:
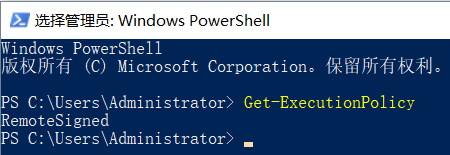
- 使用管理员运行powershell,检查执行策略:执行指令【Get-ExecutionPolicy】
- 如果结果为Restricted,那么执行指令【Set-ExecutionPolicy AllSigned】或者【Set-ExecutionPolicy Bypass -Scope Process】,直到结果为【RemoteSigned】
- 执行下面指令安装
iex ((New-Object System.Net.WebClient).DownloadString('https://chocolatey.org/install.ps1'))
-
通过choco安装OpenCV
执行下面的安装指令即可choco install OpenCV -y -version 4.1.0完毕后choco默认安装在C:\tools目录中
-
设置OpenCV环境变量
- 添加系统环境变量,变量名【OPENCV_BIN_DIR】,变量值为【C:\tools\opencv\build\x64\vc15\bin】
- 添加系统环境变量,变量名【OPENCV_DIR】,变量值为【C:\tools\opencv\build\x64\vc15】
- 添加系统环境变量,变量名【OPENCV_INCLUDE_DIR】,变量值为【C:\tools\opencv\build\include】
- 添加系统环境变量,变量名【OPENCV_LIB_DIR】,变量值为【C:\tools\opencv\build\x64\vc15\lib】
- 找到系统变量Path,追加【%OPENCV_BIN_DIR%】
-
安装opencv4nodejs
进入cmd,执行命令npm i -g opencv4nodejs命令执行过程中,会对之前通过choco方式下载好的包进入编译,编译过程中可能会出现卡住,关掉cmd窗口重新再执行命令即可。
使用
Step1:截取所需进行图像识别的元素
- 将需要进行图像识别元素所在页面截屏
- 通过adb pull命令拉取截屏图片出来
- 用画图工具打开--划重点,一定要保证图片是原大小的,不能放大或者缩小图片
- 截取其中的元素保存为图片
Step2:代码实现
java-client库中有提供了“MobileBy.image”以及“findElementByImage”方法,需要注意的是参数类型是String类型(以MobileBy.image为例)
public static By image(String b64Template) {
    return new MobileBy.ByImage(b64Template);
}
这里我们需要先将图片转换为Base64编码格式
转换代码如下:
protected String getImageAsBase64(String imageName) throws Exception {
    //在项目的根目录下有matchImages目录,该目录下存放所有需要进行图像识别的元素对应的截图
    File file = new File(System.getProperty("user.dir") + "\\matchImages\\" + imageName + ".png");
    return Base64.getEncoder().encodeToString(Files.readAllBytes(file.toPath()));
}
测试代码如下:
driver.findElement(MobileBy.image(getImageAsBase64("mylemon"))).click();
Thread.sleep(1000);
driver.findElement(MobileBy.image(getImageAsBase64("logoArea"))).click();
Thread.sleep(2000);
driver.findElement(MobileBy.id("com.lemon.lemonban:id/et_mobile")).sendKeys("13323234545");
driver.findElement(MobileBy.id("com.lemon.lemonban:id/et_password")).sendKeys("123456");
driver.findElement(MobileBy.image(getImageAsBase64("loginButton"))).click();
Step3:执行
- 开启Appium Server,通过appium -a 127.0.0.1 -p 4723命令启动
- 启动设备,通过adb devices检测设备
- 执行case
效果如下:
图像识别相关设置
Appium图像识别的准确率是跟Appium的截图功能以及我们所提供的元素截图相关的,有时候我们会发现更换一台不同分辨率的手机之后脚本就会执行失败。Appium提供了一些设置可以提高图像识别的准确率或加快图像识别的速度。
使用示例:
driver.setSetting(Setting.IMAGE_MATCH_THRESHOLD, 0.5);
以下设置项来自官方说明
| Setting Name | Description | Possible Values | Default Value |
|---|---|---|---|
| imageMatchThreshold | The OpenCV match threshold below which to consider the find a failure. Basically the range of possibilities is between 0 (which means no threshold should be used) and 1 (which means that the reference image must be an exact pixel-for-pixel match). The exact values in between have no absolute meaning. For example a match that requires drastic resizing of a reference image will come out as a lower match strength than otherwise. It's recommended you try the default setting, and then incrementally lower the threshold if you're not finding matching elements. If you're matching the wrong element, try increasing the threshold value. | Numbers from 0 to 1 | 0.4 |
| fixImageFindScreenshotDims | Appium knows the screen dimensions, and ultimately these are the dimensions which are relevant for deciding where to tap on the screen. If the screenshot retrieved (via Appium's native methods, or an external source) does not match the screen dimensions, this setting dictates that Appium will adjust the size of the screenshot to match, ensuring that matched elements are found at the correct coordinates. Turn this setting off if you know it's not necessary, and Appium will forego the check, potentially speeding things up a bit. | true or false |
true |
| fixImageTemplateSize | OpenCV will not allow the matching of a reference image / template if that image is larger than the base image to match against. It can happen that the reference image you send in has dimensions which are larger than the screenshot Appium retrieves. In this case the match will automatically fail. If you set this setting totrue, Appium will resize the template to ensure it is at least smaller than the size of the screenshot. |
true or false |
false |
| fixImageTemplateScale | Appium resizes a base image to fit its window size before matching them with OpenCV. If you set this setting totrue, Appium scales a reference image you send in as the same scale Appium scales the base image to fit the window size. e.g. iOS screenshot is 750 × 1334 pixels base image. The window size is 375 x 667. Appium rescale the base image to window size scaling it with 0.5. A reference image is based on the screenshot size, never the image matches with the window size scale. This settings allow Appium to scale the reference image with 0.5. appium-base-driver#306 |
true or false |
false |
| defaultImageTemplateScale | Appium does not resize template images by default (the value of 1.0). Although, storing scaled template images might help to save size of the storage. E.g. One has could represent 1080 × 126 pixels area by 270 × 32 pixels template image (the value of defaultImageTemplateScale is expected to be set to 4.0). Checkappium-base-driver#307 for more details. | e.g.,0.5, 10.0, 100 |
1.0 |
| checkForImageElementStaleness | It can happen that, in between the time you have matched an image element and the time you choose to tap on it, the element is no longer present. The only way for Appium to determine this is to attempt to re-match the template immediately before tapping. If that re-match fails, you will get aStaleElementException, as you would expect. Turn this to false to skip the check, potentially speeding things up, but potentially running into stale element issues without the benefit of an exception to let you know you did. |
true or false |
true |
| autoUpdateImageElementPosition | It can happen that a matched image changes position in between the time it is found and the time you tap on it. As with the previous setting, Appium can automatically adjust its position if it determines in a re-match that the position changed. | true or false |
false |
| imageElementTapStrategy | In order to tap on a found image element, Appium has to use one of its touch action strategies. The available strategies are the W3C Actions API, or the older MJSONWP TouchActions API. Stick to the default unless the driver you are using does not support the W3C Actions API for some reason. | "w3cActions"or "touchActions" |
"w3cActions" |
| getMatchedImageResult | Appium does not store the matched image result. Although, storing the result in memory might help for debugging whether which area is matched by find by image. Appium returns the image againstattribute API as visual. |
true or false |
false |
欢迎来到testingpai.com!
注册 关于